Category Archives: What?!

The AntStudio 54

I’ve been fascinated with insects since I was in elementary school and had the opportunity to visit a bee farm. The descriptions of how bees worked together along with seeing a hive behind glass has stuck with me for years – the queen bee’s abdomen colored by nail polish to make her easily identifiable.

Always a happenin’ place.

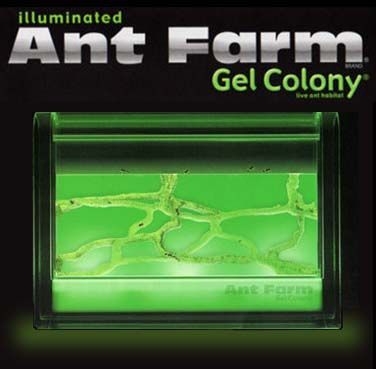
The Uncle Milton ant farm was the safest thing I could get as an alternative to my own bee colony, but it wasn’t until I was in my twenties that I finally received one as a gift. It wasn’t the classic green ant farm, but rather a gel ant farm. This further sparked my fascination with ants, but the harvester ants without a queen didn’t live very long.

Fun while it lasted….

In my quest to learn more and more about ants, I’ve stumbled across some amazing online resources: The Ants Canada Youtube Channel, AntWiki, Antfarm Yuku, etc. It wasn’t long before I joined the “build your own ant formicarium” craze.

A closeup of a Prenolepis imparis under an OMAX Stero Microscope

Over the years I attempted to build a number of plaster cast nests, but I was never able to get the build just right. Then I found Tar Heel Ants formicariums. These formicaria are built with keeping humidity levels in line with the needs of ant colonies – something I seriously struggled with in each of my homemade solutions.

Inside the nest area of a “Mini Hearth”. The water tower seems to be the secret ingredient that makes this terrarium so successful.

Ants are only fun if you can watch them – and that’s when a number of my projects merged together.

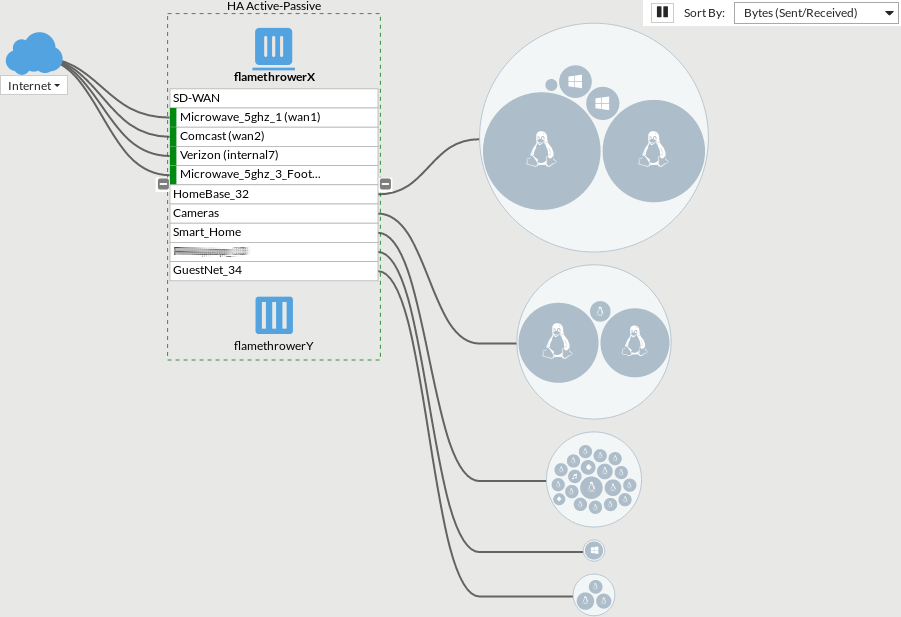
Inside my formicariums, the humidity was always too low. The humidity in my basement, on the other hand, always seemed high. When I decided to purchase a dehumidifier I wanted to measure it’s actual impact over time on my damp basement. I started a project I called “ThermoBots” to use a Raspberry Pi 2B with 2302 Temperature/Humidity sensor and create my own home environmental monitoring project.

ThermoBot – An old Raspberry Pi 2B with a 2302 Temperature/Humidity Sensor and plenty o’ hot glue.

The recipe is simple: A python/Django web application running under Apache that returns temperature and humidity values in JSON format. My home PRTG server polls and graphs these values over time.

PRTG Monitoring of my Home Office

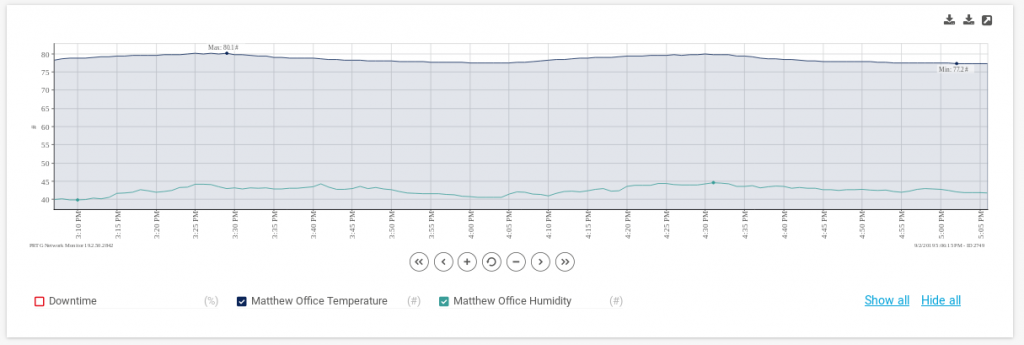
Once I created one “thermobot” I simply cloned it and now have monitoring for my loft, basement, server rack, and home office – where the “AntStudio” sits.

Behold – The AntStudio54

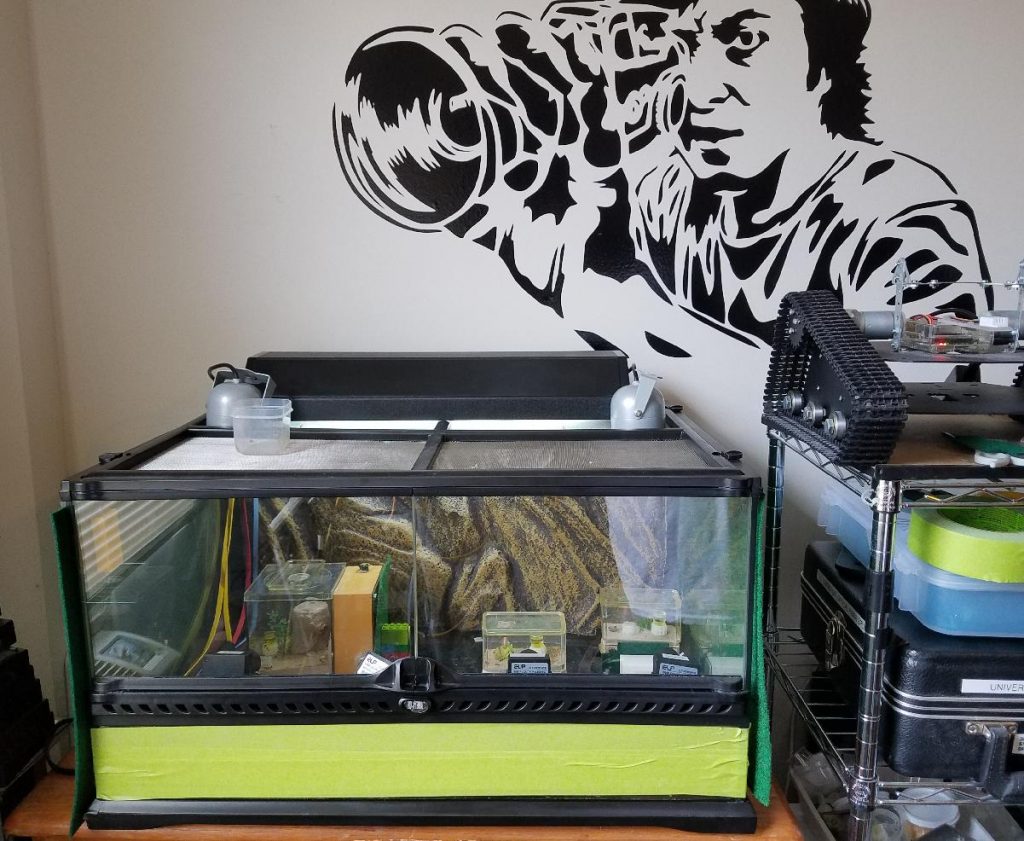
The Ant Studio is a large reptile terrarium that I’ve repurposed to house multiple Tar Heels’ Mini Hearth terrariums. The overhead vitamin D light is connected to a TP-Link SmartPlug mini, with a schedule set to activate the “Ant Sun” between 7am and 9pm.

Between 9pm and 7am, the “Ant Sun” it turned off and the “Ant Moon” is activated. The “Ant Moon” is simply a pair of IR floodlights.

I’ve attached four miniature IP Cameras (ELP-POE-1882’s with 1080p resolution) to a small piece of 2×3 lumber. These cameras have a great feature – while they don’t have an IR emitter, they support IR and thus I can view the nocturnal habits of my ants.

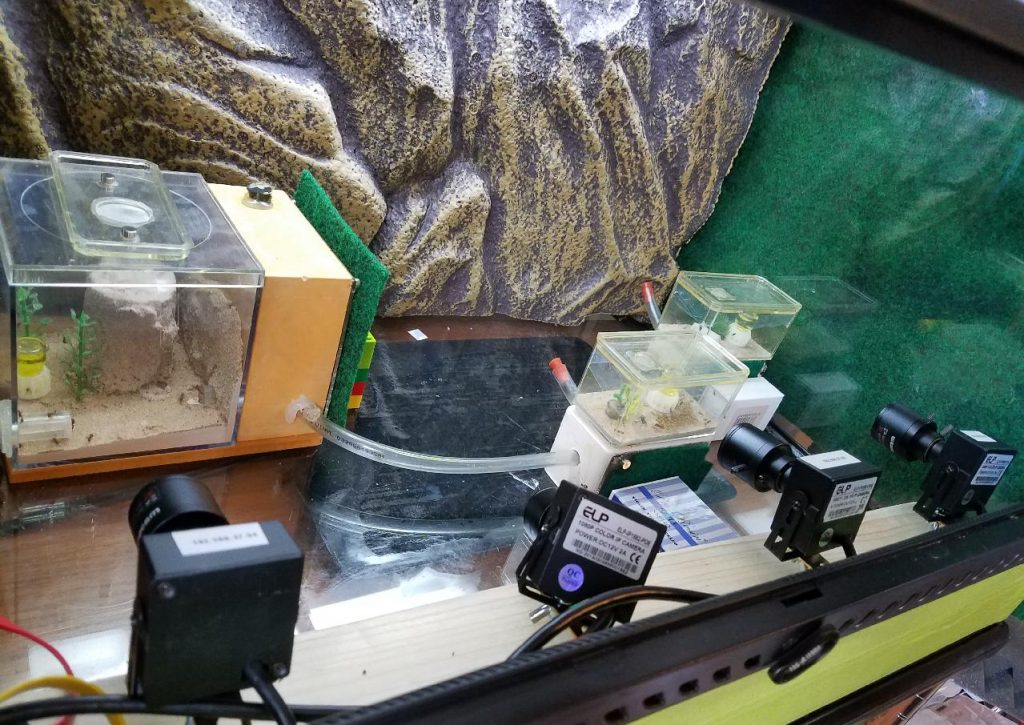
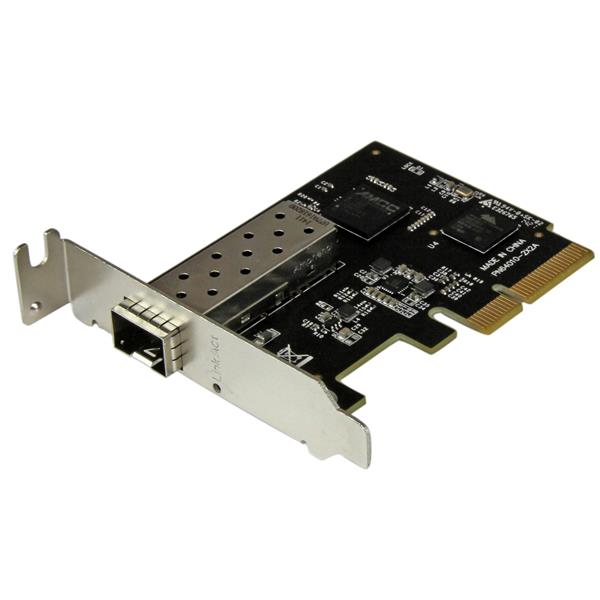
The cameras are powered via their ethernet cables, which connect to a Cisco 3750G POE switch. I have varifocal lenses attached to each camera that allow me to zoom in and out to perfect focus as I move the cameras around by hand.

I’ve included a few other items in the build, including a reptile heat mat that can also be controlled by TP-Link SmartPlugs, and because my 3rd floor office has a window air-conditioner to offset my home AC – I’ve covered the walls with reptile mat for insulation.


I’ve written two small bash script templates that leverage ffmpeg and allow me to record either the full video of an antcamera, or a timelapsed version to disk. The timelapse version runs daily creating an overview video of the day for me to watch at a later time.

I had to convert to a lower quality video file for the site…

At the 1:25 mark you can see the Ant Moon being turned on.

Script to record a timelapse video:

!/bin/bash
#Creates a timelapse video of an “AntCam”
#Create DNS entries for each camera, and symlink to this script in the form of “record–timelapse.sh”

#Usage: record–timelapse.sh


DATESTAMP=$(date +%Y-%m-%d-%H-%M)
DIR=”/virtualmachines/Ants/”
CAMERA=$(echo $0 | egrep -o “antcam[0-9]+”)
HOSTNAME=”$CAMERA.braindeadhomebase.net”
PASSWORD=”SUPERSECRETPASSWORD”
DURATION=”$1″


cd $DIR
timeout $DURATION /usr/bin/ffmpeg -nostdin -i rtsp://$HOSTNAME:554//user=admin_password=$PASSWORD_channel=1_stream=0.sdp -vf “select=gt(scene\,0.004),setpts=N/(25*TB)” $DIR/$CAMERA-timelapse-$DATESTAMP.mp4


exit

Script to record a full video:

!/bin/bash
# Creates a full video of an “AntCam”
#Create DNS entries for each camera, and symlink to this script in the form of “record-.sh”

#Usage: record-.sh
DATESTAMP=$(date +%Y-%m-%d-%H-%M)
DIR=”/virtualmachines/Ants/”
CAMERA=$(echo $0 | egrep -o “antcam[0-9]+”)
HOSTNAME=”$CAMERA.braindeadhomebase.net”
PASSWORD=”SUPERSECRETPASSWORD”
DURATION=”$1″
cd $DIR
/usr/bin/timeout $DURATION /usr/bin/nice –5 /usr/bin/ffmpeg -nostdin -i rtsp://$HOSTNAME:554//user=admin_password=$PASSWORD_channel=1_stream=0.sdp $DIR/$CAMERA-full-$DATESTAMP.mp4
exit

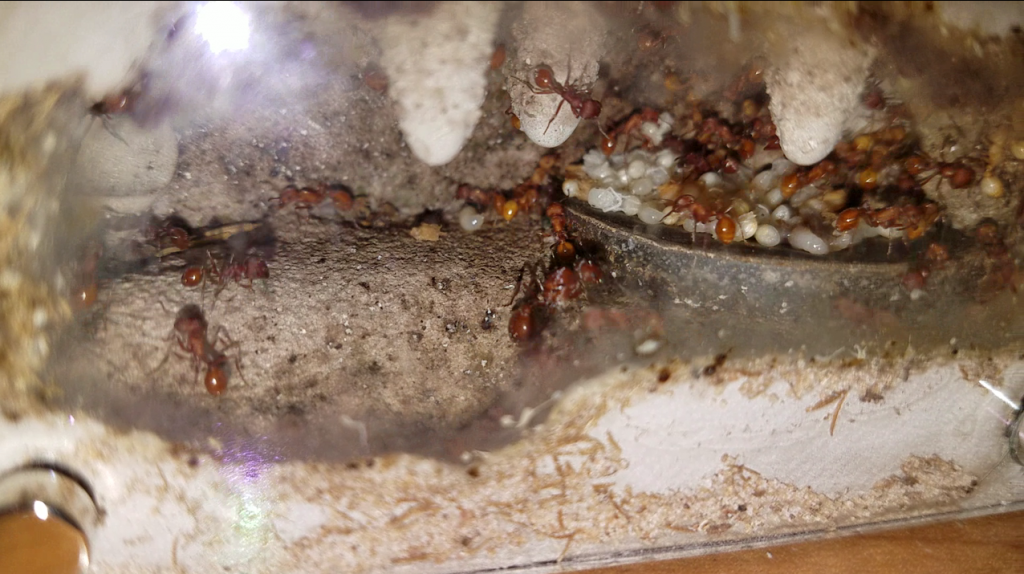
I’ve raised a handful of colonies with mixed success over the years: Tapinoma Sessile, Prenolepis Imperis, Crematagaster Cerasi. At the moment, I have two successful colonies – Pogonomyrmex Occidentalis (50+ workers) and Camponotus Pennsylvanicus (20+ workers). I’ve learned a lot about how best to care for them, if you’re new to the hobby here are some of my recommendations:

  • The Mini Hearths from Tar Heels ants solve the problem I repeatedly encountered with creating a suitable living environment. Check the water in the tower regularly.
  • Ants need carbohydrates. Initially I was feeding them honey in a straw, but the liquid feeders from byFormica work great. I use the micro sized feeders along with the byFormica Sunburst Ant Nectar.
  • Be careful what food you use – I’ve accidentally introduced some things that were harmful. Freeze dried meal worms and crickets, as well as Flukers gourmet style meal worms and crickets seem to work well.
  • My colonies LOVE live wingless fruit flies. It’s also fun to watch them hunt.
  • For the Pogo’s dandelion seeds are very popular. Be careful when introducing seeds to test them first and ensure there are no harmful pesticides present. Do this by separating a few ants with the food source for a few days as a test.
  • Fluon works great as barrier to keep your ants from escaping. I had mixed success with baby powder and rubbing alchohol, but Fluon keeps both the ants and fruit flies from climbing too high and risking escape. My experience is that it wears down after about a year, but it’s easily re-applied.
  • Get a USB vacuum cleaner and connect a large piece of tubing to it. It makes cleaning the formicarium’s much easier.
  • Having an aspirator to collect any ants that escape when moving tubing around is extremely helpful. Make sure you have it ready.

I’m working on uploading daily videos to this site. In the meantime, here’s one final video of feeding time:

Mealworm dining.


Evaluating the world of WAN link-load-balancing (SD-WAN)

It is probably obvious from the postings I’ve made here at BraindeadProjects that my home is nothing more than a giant networking lab. When I wanted to learn how GPON worked, I prepped my “lab” by building a 12 strand fiber-optic ring through the walls of my home and connecting the five Cisco switches throughout the house together using bi-directional SFPs

12 strands of fiber-optic and some kevlar blonde hair

When I needed better wireless coverage, I built out a Ubiquiti Unifi wireless network and later rewired most of the light switches in my home with Wifi-enabled TP-Link switches so that I could voice control the home using Amazon Alexa Echo’s.

The Ubiquiti UniFi Controller

Wanting to centralize my firewall policies, long ago I routed each of the 12 production VLANs at home run through a Fortigate 60C High Availability cluster.

Buy what you need, not necessary what’s new.

The home has 4 Internet connections with 2 diverse paths: The 3rd floor terminates two 5Ghz microwave PtMP links from a Wireless ISP that I used to work for. The basement terminates a Verizon 5Mbps/760Kbps DSL line, and a Comcast 100Mbps cable link.

Install large 3 foot dish while wife is busy, ask forgiveness later.

So how do I maintain connectivity to the Internet if a connection goes down or if I lose power on a floor of my home? Previously I had a simple VRRP setup: Whichever connection was performing best I would manually set to be the VRRP master and fail over if connectivity went down. If I wanted to specify that email should operate over the microwave backhauls, I would create another VRRP group (so that I could have redundancy), policy-based route email traffic to that group, and setup an IP SLA to test the connection. This was a bit of an administrative nightmare, so I did so sparingly.

Ubiquiti UNMS – a dashboard to view all of your Edge Routers

Then the world became abuzz with “Software Defined Wide Area Networking“. To qualify as “SD-WAN” Gartner has four required characteristics: The ability to support multiple connection types (MPLS, LTE, Internet, etc), support for dynamic path selection, load sharing over the links, and simplified provisioning (Zero Touch Provisioning).

I’ve had the opportunity to evaluate a small handful of “SD-WAN” solutions, each with their own pros and cons: Some are surprisingly lacking in features (despite large sales footprints), some are full of features but have lackluster provisioning, and some are insanely expensive (at least for home use).

Initially I had settled on adding a different vendor’s SD-WAN appliance into the home network and purchased 3 of their devices. After waiting for the shipment for over a month, I received a full refund from the seller with little explanation. I seriously lucked out.

Long wait, no explanation. Oh well…

While waiting for my boxes to arrive, I had the chance to borrow and test the platform and found some limitations – namely only support for 2 WAN connections and no active-active support (so I couldn’t use my other 2 WAN connections) . Then I took a closer look at the Fortigate’s I already had in my network.

Fortigate supports re-configuring each of their 10 ethernet connections for various use. This allowed me to take ports that are typically used for LAN connections and re-purpose them into WAN connections. This is a major plus. The downside was my exisiting Fortigate 60C’s don’t support the lastest FortiOS (6.0) code.

One of the 3 racks of equipment at home.

For the price of the other vendor’s limited platform (x3), I could purchase 2 used Fortigate 60D’s off Ebay – plus purchase rack-mount trays for each unit. No more Fortigate sitting atop another device in the network racks. Since I don’t need the advanced features the platform provides (anti-virus, IPS/IDS, etc), the second-hand solution is perfect for my needs (Firewall policies, SD-WAN, VPNs).

So here’s how Fortinet does things:

Configure an IP on each of the WAN connections you intend to use. In my instance, VLAN 66 is my “Internet DMZ” where each of the 4 Ubiquiti EdgeRouter X SFPs bring the Internet connections into my network.

To allow the Fortigate to have multiple WAN interfaces in the same subnet, you have to override the system default preventing that:

flamethrowerX # show system settings
config system settings
set inspection-mode flow
set allow-subnet-overlap enable
set gui-fortiextender-controller enable
end

When creating the WAN interfaces, you’ll need to manually specify the bandwidth of each link. This is one unfortunate downside to the Fortigate solution – it cannot measure available bandwidth dynamically.

When selecting the members of the “SD-WAN” interface, you may find that you’re unable to include certain interfaces. The most likely cause of this is a firewall policy referencing that interface. If you don’t follow the cookbook, you’ll likely run into this frustrating problem, so RTFM.

Oh… so that’s why I couldn’t do that… Hmm…

When you aggregate interfaces into the SD-WAN interface, you’ll need to specify the gateway of each WAN link and the default load-balancing mechanism. In my instance I’m using “Volume-based” balancing.

Defining the pie.


Under the SD-WAN rules section you can further specify how you want the volume dispersed.

Slicing up the pie.

After creating the base settings you can have the real fun. The PBR rules that used to take additional thought and design are now the matter of a point and click solution. Making email route over the 5Ghz links by default is the simple matter of creating an SD-WAN rule. Video streaming services such as NetFlix and Hulu can simply be prioritized to run over the higher bandwidth cable connection – and failover to the other options when needed.

This is WAYYYY easier than the old way of doing things.

The SD-WAN SLA’s are somewhat simplistic. You have the option to either ping or pull a web request from a designated server. Neither solution detects MTU issues in a path. If I were to disable TCP MSS clamping on my DSL line the system continues to use it despite a user being unable to download content from websites correctly.

The SD-WAN SLA’s. Pingy, pingy, pingy, pingy, pingy.

One of my favorite features in the web interface is the ability to look at the logical topology and see which users in each VLAN are consuming what amount of traffic.

Lots of penguins heading to the cloud.

You can also drill into the flows determining which flow is using which WAN link.

You go this way, you go that way, you go this way, you go that way.

So, what do I not like about the solution? I’m able to rename an interface, but on some screens the GUI displays the interface name and NOT the alias. This requires additional thought “Oh, interface7 is the DSL”.

I also wish I had the ability in each flow to see which SD-WAN rule was hit. This is important since it can help you verify that things like Email are classified correctly (I found that IMAP wasn’t considered part of the “All Email” out-of-the box classification in the non-Fortinet solution I initially purchased).

I’m still working to perfect the HA failover on the system. The general idea is that if the one Fortigate can’t ping the VRRP addresses I had setup on the WAN routers or LAN switches the backup unit should take over. “Remote Link Monitoring” took me some time to get working on the former Fortigate 60C’s, so I’m not discouraged yet.

High Availability: When you need a backup flamethrower.

Overall you can certainly see the power of what Fortinet’s re-branded “WAN Link Load-balancing” has to offer. The ability to leverage redundant Internet links in such a simple manner places some serious power in the hands of companies with limited IT resources – and I’m only scratching the surface of the capabilities.

If you’re looking to test your own WAN load balancing, I’ve put together a webpage that will display your IP address, as seen from 5 different IP lookup sites on the Internet. Feel free to use it for testing. You can find it here.

BraindeadProjects.com is BACK!

In November of 2015 (two months after my last post to this site), I opted to leave the Internet Service Provider world and attempt something new – the world of Enterprise Networking.

Who needs Visio?

Moving away from a Linux based world was an interesting prospect, but one I often looked down upon.  Seriously, the network tools available to a Linux user are more powerful than anything I’ve seen in Windows. My last ten years were spent helping to build a Pennsylvania ISP full of Linux systems that I engineered, virtualized,  built, improved upon, rebuilt and troubleshot. I had my hands in everything:  Services from email, ftp, radius, numerous webservices, etc, etc. It was a great learning environment and I had the opportunity to work and learn from some impressive people. So while I was hesitant to move on to the world dominated by Microsoft,  in time I eventually I grew a strong appreciation for the companies products.

In the 3 years since I’ve moved on I’ve certainly kept busy. I now have access to more advanced Cisco, Fortinet, and Citrix equipment,  a fascinating VSAT network at my fingertips, and a network more focuesd on high-availability. The first couple of years were a fun series of regular network events to keep myself busy most hours of the day.  At one point I started thinking I would have some form of PTSD if I that pace changed. I pride myself in being able to make solid troubleshooting decisions at 2am with no sleep.

I’ve been so busy, I’ve not posted to Braindeadprojects.com in that entire time.

I created this site as a way to contribute back to a community of online websites, blogs, IRC channels, and mailing lists that helped me learn along the way. A Saturday morning dream about building my own blog and naming it in homage to David Letterman’s “Stupid Pet Tricks” became a weekend project and thus “BraindeadProjects.com”.

Yup, I just needed a name for a website and it had to be stupid.

I only had time to document a handul of my projects, but I’m happy to share the ones that I have.

The site’s been offline for a couple of months while I handle other items, but I’ve got new articles in the works, more information to share, and I finally moved the site to my personal KVM cluster.

Braindeadeadprojects.com is back online.

A Place For Low Grade Evil

StarTech PEX10000SFP and locating modules in the Linux source.

A friend contacted me recently with issues getting a new StarTech PCIe card with SFP+ slot working. He had hoped the card would work out of the box… but sometimes that doesn’t happen.

PEX10000SFP
Our test subject: The PEX10000SFP.

First off, let’s have a look at the PCI bus and see what the card has for a device ID number:

edge:~# lspci -k

01:06.0 VGA compatible controller: Advanced Micro Devices, Inc. [AMD/ATI] ES1000 (rev 02)
Subsystem: Super Micro Computer Inc Device 1711
Kernel driver in use: radeon
03:00.0 Ethernet controller: Tehuti Networks Ltd. Device 4024
Subsystem: Tehuti Networks Ltd. Device 3015
edge:~#

As you can see, the VGA controller has a kernel module loaded and associated with it (radeon), however the Startech (Tehuti Networks) controller does not. With the device ID number in hand (0x4024), we can now look for it in the kernel source. If you don’t already have a copy of the Linux source, make sure to grab one via git:

edge:~# mkdir ~/git

edge:~# cd ~/git

edge: git# git clone git://git.kernel.org/pub/scm/linux/kernel/git/torvalds/linux.git linux

edge: git# cd ~/git/linux

edge:~# grep 0x4024 include/linux/pci_ids.h

edge:~#

Hmm…not a single hit. Let’s search for anything Tehuti related:

edge:~# grep DEVICE_ID_TEHUTI include/linux/pci_ids.h
#define PCI_DEVICE_ID_TEHUTI_3009 0x3009
#define PCI_DEVICE_ID_TEHUTI_3010 0x3010
#define PCI_DEVICE_ID_TEHUTI_3014 0x3014

So there’s device ID’s 0x3009, 0x3010, and 0x3014… but no 0x4024. So it doesn’t appear to be present in the source tree. But a quick search on the vendor website and the drivers are readily available for download – great news, but the running kernel (3.16.0-4-amd64) isn’t supported:

(From the Tehuti_TN4010.zip Readme file)

“- Supported kernels: 2.6.24 – 3.14.x”

edge:~# uname -r

3.16.0-4-amd64

And when trying to compile it, it fails:

/var/tmp/Linux/tn40.c: In function ‘bdx_ethtool_ops’:
/var/tmp/Linux/tn40.c:4021:5: error: implicit declaration of function ‘SET_ETHTOOL_OPS’ [-Werror=implicit-function-declaration]
SET_ETHTOOL_OPS(netdev, &bdx_ethtool_ops);
^
cc1: some warnings being treated as errors
/usr/src/linux-headers-3.16.0-4-common/scripts/Makefile.build:262: recipe for target ‘/var/tmp/Linux/tn40.o’ failed

So, let’s dig around and see if we can find the SET_ETHTOOL_OPS macro in the changelogs:

edge: git# cd ~/git/linux

edge:git# git log -S “#define SET_ETHTOOL_OPS”

commit 7ad24ea4bf620a32631d7b3069c3e30c078b0c3e
Author: Wilfried Klaebe <w-lkml@lebenslange-mailadresse.de>
Date: Sun May 11 00:12:32 2014 +0000

net: get rid of SET_ETHTOOL_OPS

net: get rid of SET_ETHTOOL_OPS

Dave Miller mentioned he’d like to see SET_ETHTOOL_OPS gone.
This does that.

Mostly done via coccinelle script:
@@
struct ethtool_ops *ops;
struct net_device *dev;
@@
– SET_ETHTOOL_OPS(dev, ops);
+ dev->ethtool_ops = ops;

Compile tested only, but I’d seriously wonder if this broke anything.

Suggested-by: Dave Miller <davem@davemloft.net>
Signed-off-by: Wilfried Klaebe <w-lkml@lebenslange-mailadresse.de>
Acked-by: Felipe Balbi <balbi@ti.com>
Signed-off-by: David S. Miller <davem@davemloft.net>

Well, there’s the reason it won’t compile – the macro was recently removed. So how do we get the module to compile? Simple – just update the source to perform the same action that the macro used to do. Or to make things easy (although it’s overkill for a patch file), just apply a truly braindead patch:

edge: tmp# wget http://www.braindeadprojects.com/src/tn40.c.ethtool_ops.patch

edge: tmp# patch -p0 < tn40.c.ethtool_ops.patch

patching file Linux/tn40.c

And with a quick recompile, install and modprobe, we now have a working Startech card in our system:

edge: tmp# modprobe tn40xx

edge: tmp# lspci -k

03:00.0 Ethernet controller: Tehuti Networks Ltd. Device 4024
Subsystem: Tehuti Networks Ltd. Device 3015
Kernel driver in use: tn40xx

edge: tmp## ethtool eth2
Settings for eth2:
Supported ports: [ FIBRE ]
Supported link modes: 10000baseT/Full
Supported pause frame use: Symmetric
Supports auto-negotiation: No
Advertised link modes: 10000baseT/Full
Advertised pause frame use: Symmetric
Advertised auto-negotiation: No
Speed: Unknown!
Duplex: Full
Port: FIBRE
PHYAD: 0
Transceiver: external
Auto-negotiation: off
Link detected: no

I’ve passed along the information to Startech. It’s a pretty simple fix, so I’d expect to see it in their distributed source code soon. But in the meantime, if you’re working with this card and unable to get the kernel module to build, see if this solution will work for you.